The goal of this project is to make a plant called Saw Palmetto. During modeling I tried not to miss an odd shape of leaf tip and grouping of 2~3 leaves or V shape of leaves getting flatter to the branch tip.
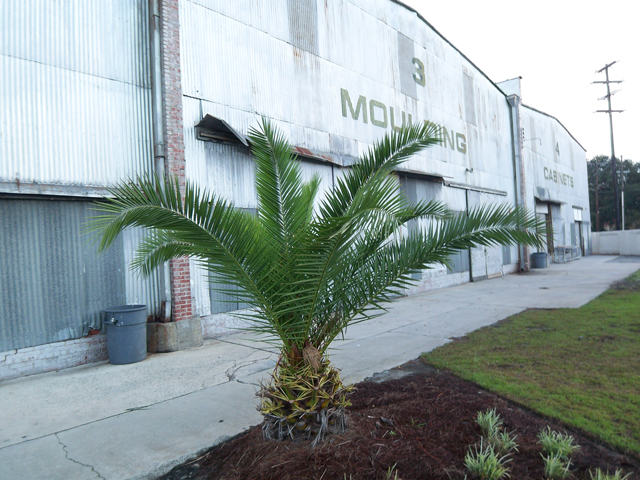
Since originally this project used to be about Level of Detail, I made my model with Nurbs because I can easily convert it to multiple resolutions of a polygon model. However, it finally didn’t happen because this project has been changed to doing reading sequence rib archives, so I concentrated to make natural movement of this plant and dynamic reading rib Archives.
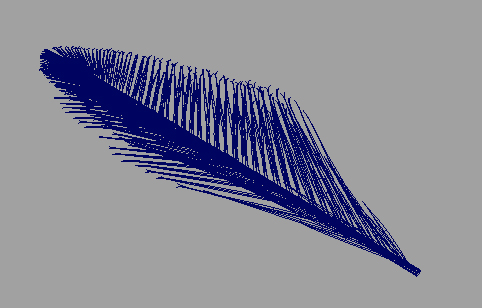
I used Maya Dynamic Hair Curve for IK Spline Solver to make natural motion of the plant. In my opinion, Maya should have named Maya Hair System just Dynamic Curve System. It can be used for many things not only hair. The most fascinating thing to me is that I can make similar motion to the soft body but length can be fixed. It has almost real time speed and is pretty easy to control. I can use it as just a Nurbs curve, a paint effect stroke and even an attractor to control Maya Fur System. Since Maya had this Hair System, I haven’t used Soft body.
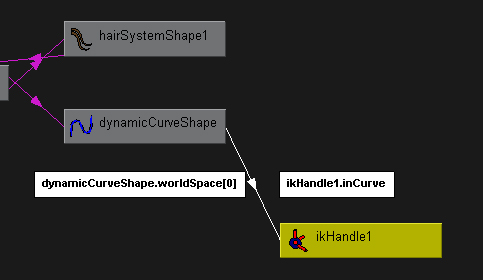
I also used IK Spline Handle and Hair Curves to about 30 leaves at the tip of the branch to make more flexible motion. First, I used just normal IK Handle Tool and replaced the curve that IK Handle Tool made automatically to the Hair Curve. The way I used to replace IK curve is that I connected DynamicCurveShape.worldSpace to IKHandle. inCurve.
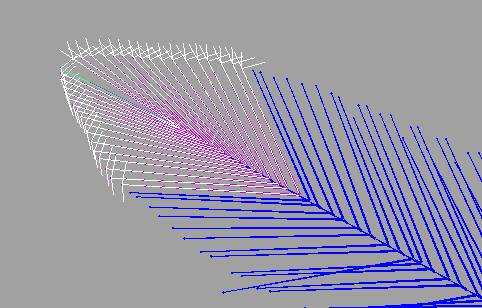
After I finished a test simulation of one branch I started to make entire plant motion. I started with empty scene that has only arranged Hair Curves. I made natural motion using Dynamic Air field and Turbulence attribute that is included in the Hair System. After I finished the movement of the plant, I imported the branches, and switched IK Handle Curves to the Hair curves whose movements were done, and by watching playblasts I tweaked detail motion.
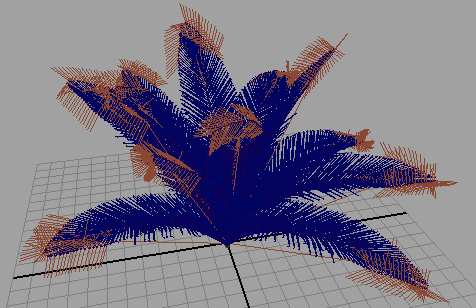
The next step was exporting it as a rib archive. In this step, I confronted with a problem. I used 75 joints in the main stem to make perfectly flexible motion, and the Nurbs geometries which are leaves were parented to the joints instead of binding for fast simulation, which means each leaf has more then 75 level of hierarchy structure, and they directly go to rib as “TransformBegin, TransformEnd”. It was not an important problem that file size got bigger, but the real problem was exporting itself could not be done because it was too slow. Fortunately, I could export it using previous version MTOR_RIBArchive instead of using RIB_Archive exporter. At least it worked even though so slow. I tried to use Geometry Cache function in Maya 8.5 to remove all hierarchy information, but Geometry Cache uses component information, so in this case where I didn’t use binding, it didn’t work. I will find out how to solve this kind of problem later.
The last step was reading Rib Archiving in Maya and rendering them. Renderman Studio now has a different solution from previous version MTOR which is rib box. I knew rib box was controlled by Slim and had to be attached like shaders. Now the control of attaching and detaching shaders is in Maya not the Slim, so it actually became easy to use because the middle step has been eliminated like using mattr command, but I’m not sure whether they still support TCL script that could make clever tricks.
Renderman Studio Tutorial shows pretty complicated setting for Dynamic Read Archives. They suggest using some mel scripts which uses DelayedReadArchive rib procedure instead of ReadArchive. In most case, DelayedReadArchive is more efficient than ReadArchive.
According to Documentation,
“the reading is delayed until the procedural primitive bounding box is reached (unlike RiReadArchive, which reads RIB files immediately during parsing)”
Which means it can render heavier scene using same hardware because before the rederer reachs a bounding box, memory doesn’t have any information of the actual model. It sounds there is no reason to use ReadArchive at all, but if a rib archive has information not related to bounding box such as lights or reading another rib archive, using only DelayedReadArchive can make a problem.
To use DelayedReadArchive, you don’t have to follow the Tutorial that Documentation provides because Renderman Studio provides new mel commands that are started with “Ri”. Actually, rmanAddDelayedReadArchiveAttrs.mel, which can be found in Tutorial, uses also one of these new mel commands. These commands make user be able to write rib procedure directly into a rib file in Maya. Also they can be placed to many places like postTransform, preShape, TransformBegin or FrameBegin. For these reason, now Maya can relatively simply make numberd rib archive file name using mel and read sequence rib archives.
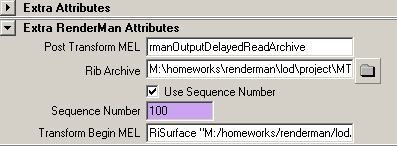
Although setting for Dynamic Read Archive is complicated, it is not so difficult to use it. I made a polygon box and made it big as the actual model which the rederer will read at the render time and applied Freeze Transform to the box. This process will return 6 numbers, which are the size of bounding box, for DelayedReadArchive procedure. Later I executed rmanAddDelayedReadArchiveAttrs.mel which adds an attribute for renderman to the box transform node, and I could simply press the browse button and pointed the rib file that I exported. Polygon Box should not be rendered, so I disconnected the link between the box and Default Shading Group. As you could see in the picture, I added one more attribute which is Transform Begin Mel. Since I didn’t export my branch rib sequence with a shader, I had to assign a shader at this time. New Ri Mel command makes this type of process easy. I used RiSurface which puts “Surface </shader/path>” right next TransformBegin procedure in the rib file. Of course it can be not only single Mel command but also entire Mel procedure like rmanOutputDelayedReadArchive in the Post Transform Mel.
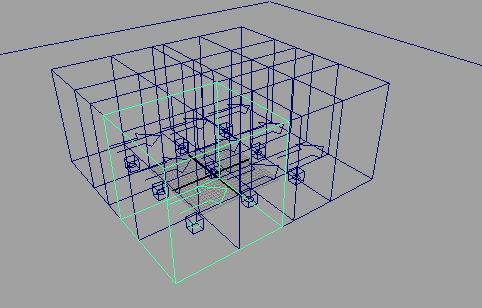
So here is the first rendered test movie.